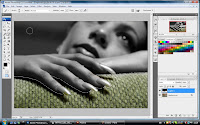
1)Use brush tool and set the color to black and brush the wallpaper and leave some part in original color.but remember to create the layer before you do any edit in the image.
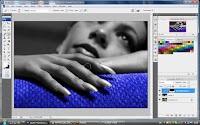 2)Click on the Path and active the Fabric Cut Out.Then come to adjustment layer and choose the HUE/SATURATION.And base on what color you like and adjust the sofa color
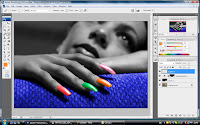 3)Create the new layer and set the layer mode to color.Use the brush tool to fill the color to the women nail.
 4)Browse the image file which title is Model.jpg.o to click on image and choose MODE click on GRAY SCALE.Then go to channel and click the extra menu and choose Duplicate channel for create a brand new file.After that undo the Model.jpg to the original look.
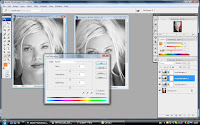 5)create two color adjustment by using adjustment layer and select HUE/SATURATION and click ok.and repeat the same step as we do just now.after the menu pop up decrease the SATURATION to -100.Then go the the first adjustment layer we created just now
In the dialog box we create just now.Try to do some adjustment to make some color of the image can display more clear.Follow the below step:
select RED from the EDIT place to try it out with the lightness to (-26),
ctrl + 2 yellow color, set lightness to (-100).
ctrl + 3 green color, set lightness to (-64).
ctrl + 4 cyan color, set lightness to (-26).
ctrl + 5 blue color, set lightness to (-91).
ctrl + 6 magentas color, set lightness to (0) and click OK
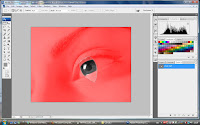 6)Browse the eye.jpg image.click on view and select the actual pixels.Go LAYER pallet click ADJUSTMENT LAYER and select HUE/SATURATION.and follow the instruction:select HUE (35), saturation (30).Then use the pen tool to draw the path.Click and drag to create a curve that cover the outline of the eye and adjust the curve by using the ctrl key if you need to.after that create 1 more channel for another curve we need to create later.Press control D to diselecte the cruve we just created just now.Go back to the path and draw brand new path from top to bottom.after that repeat the step we have just done.Click the visibility for RGB and Alpha 1
we create in the channel just now and go to FILTER and choose BLUR with GAUSSIAN BLUR adjust it to 2.5. select the alpha 2 by turn on the RGB.Then use the LASSO tool, drag a box to divide the eye to become two part for the left hand side of the eye. Press FILTER and choose BLUR with GAUSSIAN BLUR and adjust it to 3.5
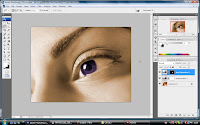 Press control +D to de-select and select RGB.Then click ctrl key and click alpha 1, and shift + ctrl + alpha 2 to combine alpha 1 and 2.For undo that, ctrl + alt to minus the part of the alpha 2.For indo, ctrl + alt + shift + alpha 2 for the overlapping area.Go to LAYER pallet,find ADJUSTMENT pallet and select HUE/SATURATION.Finally,select the color that u wish to apply into the eye.
No comments:
Post a Comment