Thursday, November 27, 2008

Final Project Charter Assignment 1

Assignment 1 Title: Printout Postcard for the theme “Malaysia, Truly Asia”.

Project Start Date: 5 November 2008

Project Finish Date: 28 November, 2008.

Project Manager: Oh Jia Hua

HP: 0174113555

Email: nick1437@hotmail.com

Website: http://mcg1014-1071119577.blogspot.com/

Project Objective: Students are to create a multi-cultural event for a post card. The theme would be “Malaysia, Truly Asia” which is the official slogan for Malaysia Tourism. Students are to show the multi-cultural aspects of Malaysia culture or life as a positive feature to attract tourist into this country.

Approach: The tools I used for create my assignment1 is Quick select tool,Caussian Blur,Rectangular marquee Tool,Gradian Tool,Brush Tool,Type Tool,Screen.

How do create the Postcard:

1)Before I start to create my project.i have simply sketch out my idea in the paper.

2)After that,I search some image that suitable to apply my idea.


3)I’ve use the photoshop to edit the image:


Image:

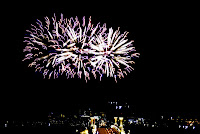
For delete the background of the image.I've used Quick select tool to select the part of image I want to delete.Then go to select__Refine Edge.Before click on ok,It will appear the pop out menu to let you adjust the outline to make it more soft.Once I completed edit the image.I created the new layer for the background and do some setting to make the background of the postcard have a different look.For apply the firework in the postcard.First,find some firework image and use color curve to set the firework more clear.Then drag the image into the postcard and apply it to screen.Then the background of the firework will automatic hide in the backgroup of the postcard.

Background:

First,find the color which is suitable and perfect match with the image you select.After that apply it into the background.


Idea for create the project:

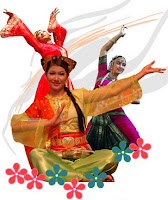
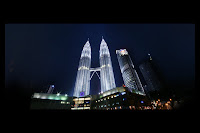
I have put some several image that can represent the culture of my country like different traditional shirt for different region.And also I select the building that represent the Malaysian.


Time Plan:

5 Nomember 2008-15 November 2008=searc

h the image form the internet

15 November.2008-20 November 2008=edit the image that I need to put in the backgroup and create the background.

25 November 2008=submit the proposal.


Comment: Im happy to do this project.Because during I doing this project,I gain a lot of tour knowledge about my country.And is it really hard for learn the software I never see before.But finally,I succesed.Ha Ha Ha

Final Work

Monday, November 24, 2008

Project Charter Assignment 1

Assignment 1 Title: Printout Postcard for the theme “Malaysia, Truly Asia”.

Project Start Date: 5 November 2008

Project Finish Date: 28 November, 2008.

Project Manager: Oh Jia Hua

HP: 0174113555

Email: nick1437@hotmail.com

Website: http://mcg1014-1071119577.blogspot.com/

Project Objective: Students are to create a multi-cultural event for a post card. The theme would be “Malaysia, Truly Asia” which is the official slogan for Malaysia Tourism. Students are to show the multi-cultural aspects of Malaysia culture or life as a positive feature to attract tourist into this country.

Approach: The tools I used for create my assignment1 is Quick select tool,Caussian Blur,Rectangular marquee Tool,Gradian Tool,Color curve,Color Dodge.

How do create the Postcard:

1)Before I start to create my project.i have simply sketch out my idea in the paper.

2)After that,I search some image that suitable to apply my idea.


3)After that,I’ve use the photoshop to edit the image:


Image:

For delete the backgroup of the image.I,ve used Quick select tool to select the part of image I want to delete.Then go to select__Refine Edge.Before click on ok,It will apper the pop out menu to let you adjust the outline to make it more soft.Once I completed the edit the image.I created the new new layer for the backgroup and do some setting to make the backgroup of the postcard have a different look.


Backgroup:

First, apply the gradian color in the blank paper.After that create Rectange Marquee tool to create the half full size rectange in the backgroup cover with gradian color.Set the rectange to render----clouds.Then go to image-----Adjustment and select Thresthold.Try to readjust the Thresrhold level to the requre you need.Then click on ok and deselect it.Go to Filter to select the gradial Blur.Remeber put the Blur method to zoom.Once you done to this step.Go to the Layer and below got one selection box and pick color Dodge.


Idea for create the project:

I have put some several image that can represt the culture of my country like different traditional shirt for different region.And also I select the building that reprenset the Malaysian.


Time Plan:

5 Novmber 2008-15 Nomber 2008=search the image form the internet

15 Nomber.2008-20 Nomber 2008=edit the image that I need to put in the backgroup and ceate the backgroup.

25 Nomber 2008=sumbit the propesal.


Comment: Im happy to do this project.Because during I doing this project,I gain a lot of tour knowledge about my country.And is it really hard for learn the software I never see before.But finally,I succesed.Ha Ha Ha

Tutorial 2(II)


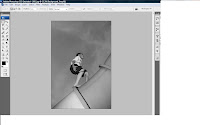
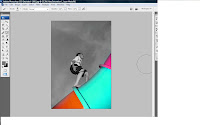
1) Select IMAGE click MODE and choose GREYSCALE. Click ok with the pop out menu.


2)Create new layer , choose the color mode with the the pixel the suitable and easy for you to brush your image.choose any color that you like to apply in your image from the color pallet and pain your picture.

Sunday, November 23, 2008

Tutorial 2


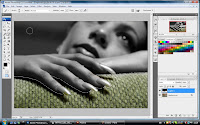
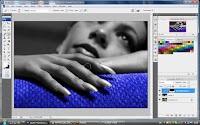
1)Use brush tool and set the color to black and brush the wallpaper and leave some part in original color.but remember to create the layer before you do any edit in the image.

2)Click on the Path and active the Fabric Cut Out.Then come to adjustment layer and choose the HUE/SATURATION.And base on what color you like and adjust the sofa color

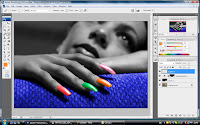
3)Create the new layer and set the layer mode to color.Use the brush tool to fill the color to the women nail.

4)Browse the image file which title is Model.jpg.o to click on image and choose MODE click on GRAY SCALE.Then go to channel and click the extra menu and choose Duplicate channel for create a brand new file.After that undo the Model.jpg to the original look.

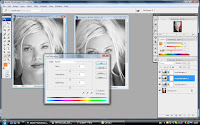
5)create two color adjustment by using adjustment layer and select HUE/SATURATION and click ok.and repeat the same step as we do just now.after the menu pop up decrease the SATURATION to -100.Then go the the first adjustment layer we created just now
In the dialog box we create just now.Try to do some adjustment to make some color of the image can display more clear.Follow the below step:
select RED from the EDIT place to try it out with the lightness to (-26),
ctrl + 2 yellow color, set lightness to (-100).
ctrl + 3 green color, set lightness to (-64).
ctrl + 4 cyan color, set lightness to (-26).
ctrl + 5 blue color, set lightness to (-91).
ctrl + 6 magentas color, set lightness to (0) and click OK

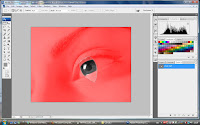
6)Browse the eye.jpg image.click on view and select the actual pixels.Go LAYER pallet click ADJUSTMENT LAYER and select HUE/SATURATION.and follow the instruction:select HUE (35), saturation (30).Then use the pen tool to draw the path.Click and drag to create a curve that cover the outline of the eye and adjust the curve by using the ctrl key if you need to.after that create 1 more channel for another curve we need to create later.Press control D to diselecte the cruve we just created just now.Go back to the path and draw brand new path from top to bottom.after that repeat the step we have just done.Click the visibility for RGB and Alpha 1
we create in the channel just now and go to FILTER and choose BLUR with GAUSSIAN BLUR adjust it to 2.5. select the alpha 2 by turn on the RGB.Then use the LASSO tool, drag a box to divide the eye to become two part for the left hand side of the eye. Press FILTER and choose BLUR with GAUSSIAN BLUR and adjust it to 3.5
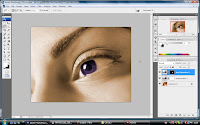
Press control +D to de-select and select RGB.Then click ctrl key and click alpha 1, and shift + ctrl + alpha 2 to combine alpha 1 and 2.For undo that, ctrl + alt to minus the part of the alpha 2.For indo, ctrl + alt + shift + alpha 2 for the overlapping area.Go to LAYER pallet,find ADJUSTMENT pallet and select HUE/SATURATION.Finally,select the color that u wish to apply into the eye.

Wednesday, November 19, 2008

My first work of Computer graphic 2

Step for tutorial 1


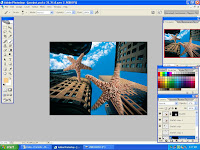
First,apply some blur effect(Gaussian)in the wallpaper.Drag the starfish into the wallpaper and hold control and T key to re size and rotate the starfish.


Second,hold the ALT key and drag the starfish to generate another starfish.


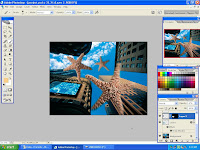
Apply some radial blur effect make the starfish like fall down from the top.

Modify the TV screen and paste it in the wallpaper and hold the control and T key to adjusted it to a proper shape.

Drop the shadow at the back of the TV screen and use the Lasso tool to create the outline of the shadow range.

Welcome to my CG2